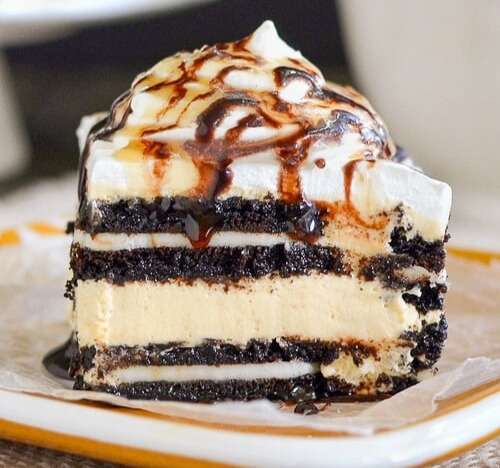
Irresistible Salted Caramel Oreo Icebox Cake
Table of Contents
- Ingredients
- Instructions
- Step 1: Prepare the Whipped Cream
- Step 2: Prepare the Salted Caramel Sauce
- Step 3: Prepare the Cream Cheese Filling
- Step 4: Assemble the Cake
- Step 5: Chill and Serve
- Tips for Perfect Salted Caramel Oreo Icebox Cake
- Variations to Try
- Chocolate Peanut Butter Oreo Icebox Cake
- Mint Chocolate Oreo Icebox Cake
- Berry Oreo Icebox Cake
- Conclusion
Irresistible Salted Caramel Oreo Icebox Cake
- azeem memon
- 01-06-2024
- 01-06-2024
- 3213 views
- Coffee Recipes

When it comes to decadent desserts, few can resist the allure of a well-made icebox cake. Combining the rich flavors of salted caramel and Oreo cookies, this no-bake dessert is sure to become a favorite in your household. Easy to assemble and perfect for any occasion, this salted caramel Oreo icebox cake is a showstopper that requires minimal effort for maximum satisfaction. In this blog, we’ll guide you through the ingredients, steps, and tips to create this irresistible dessert.
Ingredients
To make this salted caramel Oreo icebox cake, you’ll need the following ingredients:
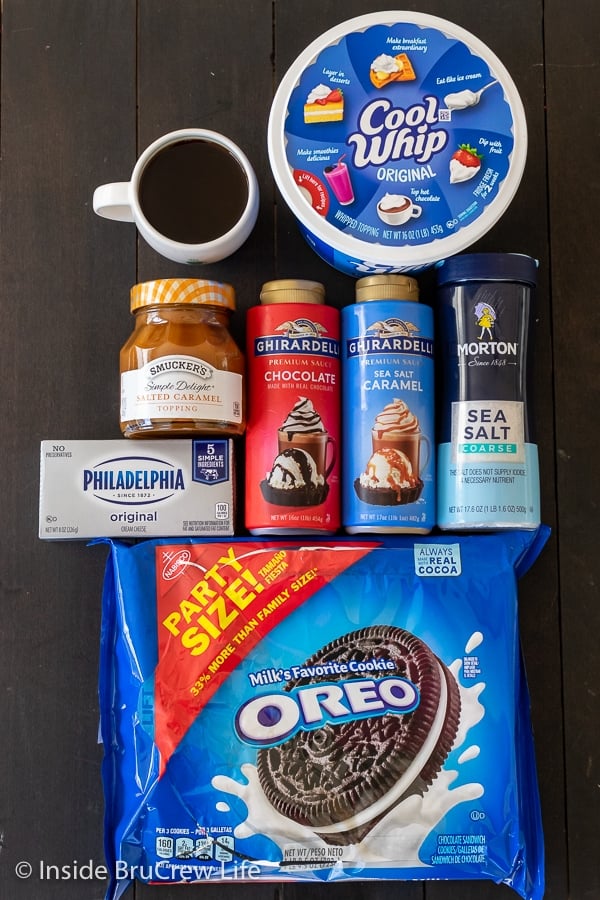
- 2 packs of Oreo cookies (approximately 60 cookies)
- 2 cups heavy whipping cream
- 1/4 cup powdered sugar
- 1 teaspoon vanilla extract
- 1 cup salted caramel sauce (store-bought or homemade)
- 1/2 teaspoon sea salt flakes
- 8 ounces cream cheese, softened
- 1/2 cup granulated sugar
- 1 cup milk
- 1 pack instant vanilla pudding mix (3.4 ounces)
- Optional garnish: extra crushed Oreos, caramel drizzle, sea salt flakes
Instructions
Step 1: Prepare the Whipped Cream
Begin by preparing the whipped cream, which will be used to create the cake’s layers and give it a light, airy texture.
- In a large mixing bowl, combine 2 cups of heavy whipping cream, 1/4 cup powdered sugar, and 1 teaspoon vanilla extract.
- Using an electric mixer, beat the mixture on medium-high speed until stiff peaks form. This should take about 3-5 minutes.
- Set the whipped cream aside in the refrigerator until ready to use.
Step 2: Prepare the Salted Caramel Sauce
If you prefer to make your own salted caramel sauce, follow these simple steps:
- In a medium saucepan over medium heat, combine 1 cup granulated sugar and 1/4 cup water.
- Stir until the sugar has dissolved, then stop stirring and let the mixture boil until it turns a deep amber color.
- Remove the saucepan from heat and carefully add 1/2 cup heavy cream, stirring continuously.
- Stir in 4 tablespoons unsalted butter, 1/2 teaspoon sea salt flakes, and 1 teaspoon vanilla extract until smooth.
- Let the caramel sauce cool before using it in the recipe.
Step 3: Prepare the Cream Cheese Filling
The cream cheese filling adds a rich, creamy layer to the cake that complements the Oreo cookies and caramel sauce.
- In a medium mixing bowl, beat 8 ounces of softened cream cheese and 1/2 cup granulated sugar until smooth and creamy.
- In a separate bowl, prepare the instant vanilla pudding mix according to the package instructions using 1 cup of milk.
- Once the pudding has set, gently fold it into the cream cheese mixture until well combined.
Step 4: Assemble the Cake
Now it’s time to assemble the icebox cake, which involves layering the prepared ingredients in a dish.
- Begin by spreading a thin layer of whipped cream on the bottom of a 9×13-inch baking dish. This will help the first layer of cookies adhere to the dish.
- Place a single layer of Oreo cookies on top of the whipped cream, breaking the cookies as needed to fit the edges of the dish.
- Spread a layer of the cream cheese filling over the cookies, followed by a drizzle of salted caramel sauce.
- Sprinkle a small amount of sea salt flakes over the caramel sauce.
- Add another layer of whipped cream on top of the caramel, followed by another layer of Oreo cookies.
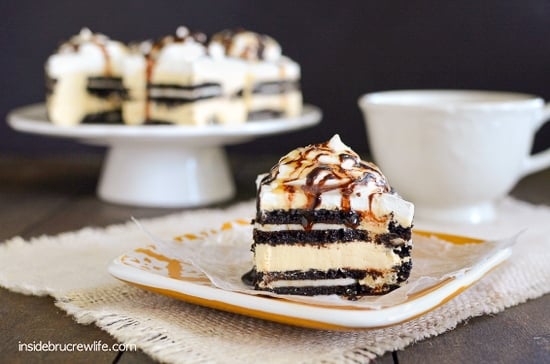
- Repeat the layers (cream cheese filling, caramel sauce, sea salt flakes, whipped cream, and cookies) until you reach the top of the dish, finishing with a layer of whipped cream.
Step 5: Chill and Serve
The final step is to chill the assembled cake to allow the flavors to meld and the cookies to soften.
- Cover the baking dish with plastic wrap and refrigerate for at least 4 hours, or overnight for best results.
- Before serving, you can add optional garnishes such as extra crushed Oreos, a drizzle of caramel sauce, and a sprinkle of sea salt flakes.
- Slice and serve the cake chilled. Enjoy the rich, creamy, and irresistible flavors of your salted caramel Oreo icebox cake!
Tips for Perfect Salted Caramel Oreo Icebox Cake
Here are some additional tips to ensure your icebox cake turns out perfectly every time:
- Use Full-Fat Ingredients: Full-fat cream cheese and heavy whipping cream will give you the best texture and flavor.
- Chill Time: For the best results, let the cake chill overnight. This allows the cookies to soften and the flavors to meld together beautifully.
- Layer Evenly: Make sure each layer is spread evenly to ensure consistent texture and flavor throughout the cake.
- Homemade Caramel Sauce: While store-bought caramel sauce is convenient, making your own can add a richer, more authentic flavor.
- Experiment with Flavors: Feel free to experiment with different flavors of Oreos or add a layer of chocolate ganache for an extra indulgent touch.
Variations to Try
If you want to switch things up or cater to different tastes, here are some delicious variations of the salted caramel Oreo icebox cake:
Chocolate Peanut Butter Oreo Icebox Cake
- Replace the salted caramel sauce with a chocolate ganache made from melted chocolate and heavy cream.
- Add a layer of peanut butter mixed with powdered sugar for a rich, nutty flavor.
Mint Chocolate Oreo Icebox Cake
- Use Mint Oreo cookies instead of regular Oreos.
- Add a layer of mint-flavored whipped cream or mint extract to the cream cheese filling for a refreshing twist.
Berry Oreo Icebox Cake
- Add a layer of fresh berries such as strawberries, raspberries, or blueberries between the layers of cookies and cream.
- Drizzle with a berry compote instead of caramel sauce for a fruity variation.
Conclusion
Creating a salted caramel Oreo icebox cake is a fun and rewarding process that results in a stunning and delicious dessert. By following these steps and tips, you can impress your friends and family with a dessert that’s both visually appealing and mouth-wateringly tasty. Whether you’re celebrating a special occasion or simply craving a sweet treat, this icebox cake is sure to satisfy.
Remember to let your creativity shine by experimenting with different flavors and variations. With its simple preparation and impressive results, the salted caramel Oreo icebox cake is destined to become a go-to dessert in your recipe repertoire. Enjoy the process and, most importantly, enjoy every bite of this delightful creation!


