The Perfect Pour: A Guide to Making Nitro Coffee at Home


The Perfect Pour: A Guide to Making Nitro Coffee at Home
- azeem memon
- 10-21-2023
- 06-08-2026
- 2110 views
- Featured Articles
Nitro coffee has transformed from a specialty café novelty into one of the most popular coffee trends among enthusiasts. Known for its smooth texture, cascading bubbles, and naturally creamy mouthfeel, nitro coffee offers a unique drinking experience that stands apart from traditional iced coffee and cold brew.
Served cold and infused with nitrogen gas, nitro coffee delivers a rich, velvety texture without requiring milk, cream, or added sweeteners. Its naturally sweet flavor profile and visually striking presentation have made it a favorite among coffee lovers seeking a refreshing and modern beverage.
While nitro coffee is commonly found in coffee shops, many people are surprised to learn that it can also be made at home. With the right equipment, quality coffee beans, and a bit of practice, you can create café-style nitro coffee from the comfort of your kitchen.
What Is Nitro Coffee?
Nitro coffee is cold brew coffee that has been infused with nitrogen gas and served under pressure.
How Nitrogen Changes Coffee
Nitrogen is an odorless and flavorless gas that creates tiny bubbles when infused into coffee. These microscopic bubbles give nitro coffee its signature characteristics:
- Creamy texture
- Smooth mouthfeel
- Thick, cascading appearance
- Naturally sweeter taste perception
- Reduced bitterness
Unlike carbonated beverages, nitro coffee does not have a fizzy or sparkling sensation. Instead, it feels soft and silky on the palate.
Why Nitro Coffee Became Popular
Coffee drinkers appreciate nitro coffee because it offers a luxurious texture without additional ingredients. The infusion process enhances the drinking experience while maintaining the coffee’s natural flavors.
Its popularity has grown due to:
- Specialty coffee culture
- Cold brew popularity
- Café-quality presentation
- Refreshing taste
- Lower perceived acidity
Understanding the Importance of Cold Brew
Before creating nitro coffee, you first need a quality cold brew concentrate.
Why Cold Brew Works Best
Cold brew coffee is made by steeping coffee grounds in cold water for an extended period, typically between 12 and 24 hours.
This process creates coffee that is:
- Smooth
- Less acidic
- Naturally sweet
- Full-bodied
- Highly concentrated
These characteristics make cold brew the ideal foundation for nitrogen infusion.
Choosing the Right Coffee Beans
Bean selection plays a significant role in the final flavor of your nitro coffee.
Many coffee enthusiasts prefer:
- Medium roasts for balanced sweetness
- Medium-dark roasts for chocolate notes
- Single-origin coffees for distinct flavors
- Freshly roasted beans for maximum freshness
Experimenting with different origins and roast profiles can help you discover your preferred nitro coffee style.
Equipment Needed for Home Nitro Coffee
Making nitro coffee at home requires a few specialized tools.
Essential Equipment
To get started, you will typically need:
- Cold brew coffee
- Nitrogen charger or nitrogen tank
- Nitro coffee dispenser or keg
- Fine coffee filter
- Refrigerator space for chilling
While the initial investment may seem significant, it can save money compared to purchasing nitro coffee regularly from cafés.
Choosing a Nitro System
Home brewers generally use one of two methods:
Nitro Coffee Keg Systems
These systems closely replicate commercial café setups and provide the most authentic nitro experience.
Benefits include:
- Consistent nitrogen infusion
- Professional-style pours
- Larger serving capacity
- Excellent texture
Whipped Cream Dispenser Method
A whipped cream dispenser adapted for coffee is a more affordable entry point for home users.
Advantages include:
- Lower cost
- Easy setup
- Compact storage
- Suitable for small batches
While results may vary slightly compared to full keg systems, many coffee lovers find this method highly effective.
How to Make Cold Brew for Nitro Coffee
Creating a strong cold brew base is the first step.
Step 1: Grind Your Coffee
Use a coarse grind similar to what is commonly used for a French press.
A coarse grind helps:
- Prevent over-extraction
- Reduce sediment
- Improve filtration
Step 2: Combine Coffee and Water
Mix coffee grounds with cold filtered water in a large container.
A stronger brewing ratio is often preferred for nitro coffee because the nitrogen infusion can slightly soften flavor intensity.
Step 3: Steep Slowly
Allow the mixture to steep in the refrigerator or a cool location for 12 to 24 hours.
Longer steeping times generally create:
- Greater body
- Richer flavor
- Enhanced sweetness
Step 4: Filter Thoroughly
Remove all coffee grounds using a fine filter.
A clean filtration process is important because leftover sediment can affect texture and interfere with nitrogen infusion equipment.
Infusing Coffee With Nitrogen
Once your cold brew is prepared, it is time to introduce nitrogen.
Chilling the Coffee
Cold temperatures improve nitrogen absorption.
Before infusion:
- Refrigerate the coffee completely
- Ensure equipment is clean
- Keep everything as cold as possible
This helps produce the smoothest texture and best visual effect.
Charging With Nitrogen
Add the cold brew to your nitro system and introduce nitrogen according to the manufacturer’s instructions.
The coffee is then pressurized and allowed to absorb the gas.
During this stage, nitrogen creates the tiny bubbles responsible for nitro coffee’s signature appearance and mouthfeel.
Letting the Coffee Rest
Many home brewers allow the infused coffee to rest for several hours before serving.
This resting period can help:
- Improve consistency
- Enhance texture
- Create a smoother pour
Patience often leads to better results.
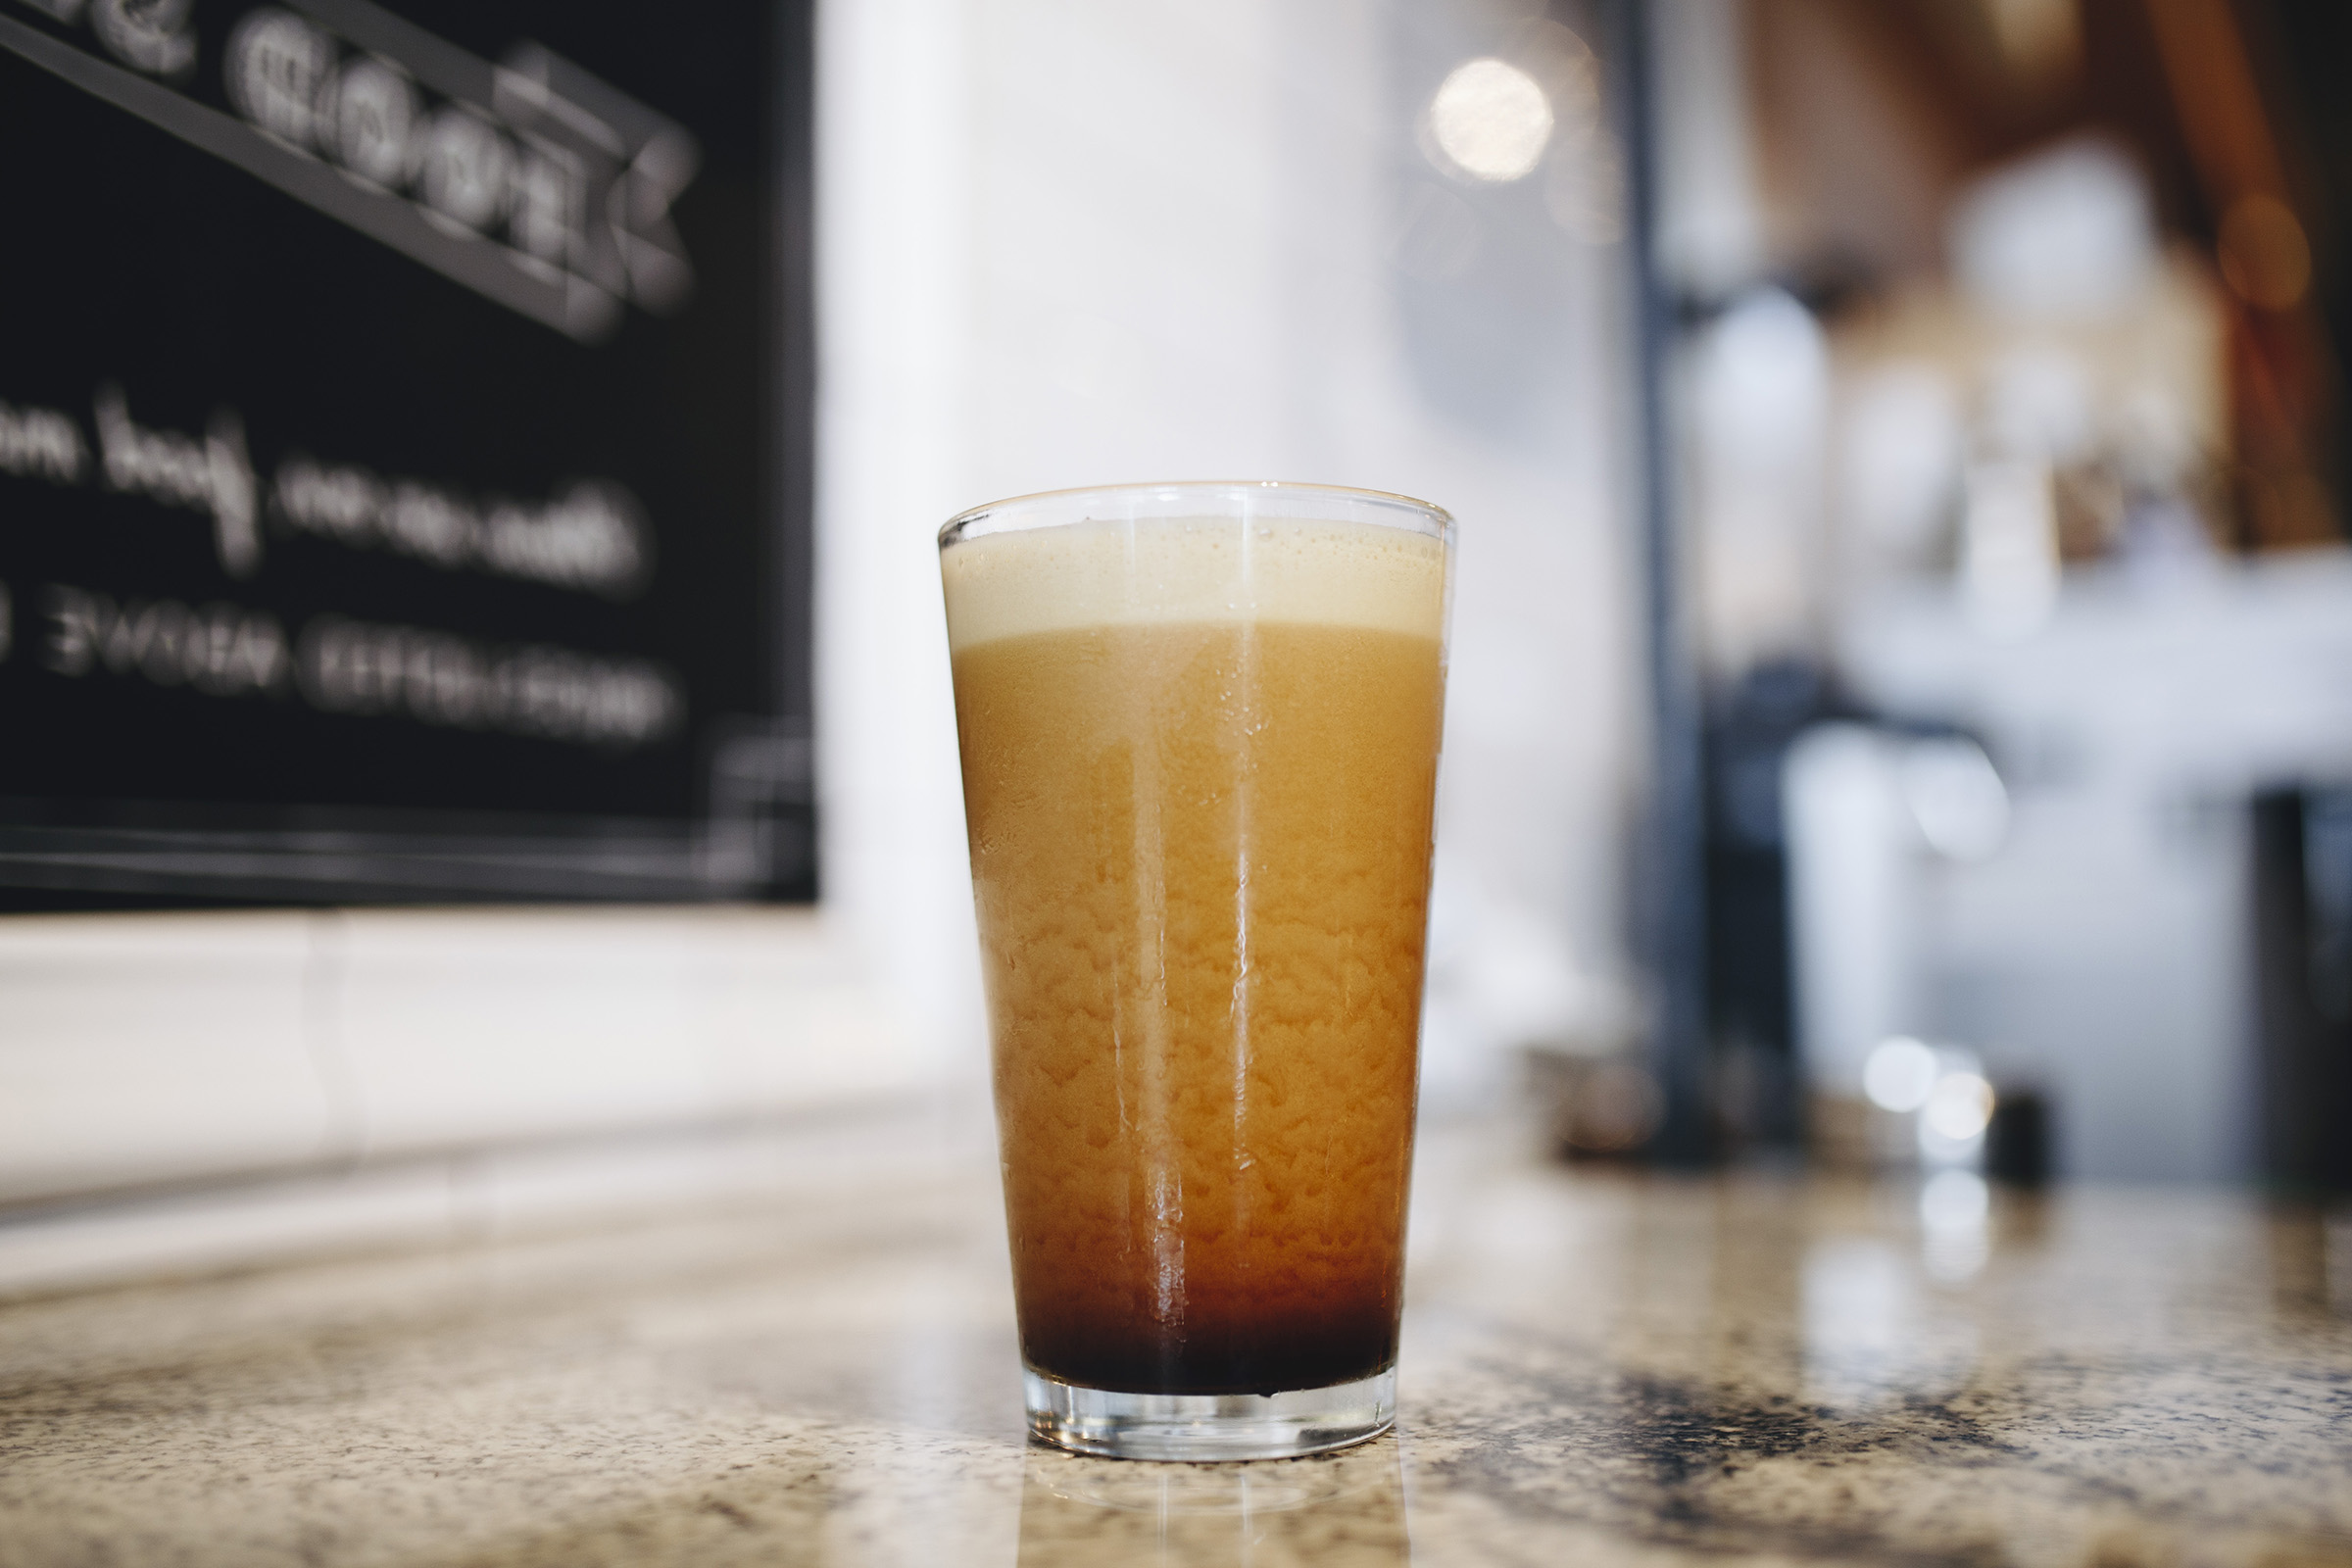
Achieving the Perfect Pour
The presentation of nitro coffee is one of its most appealing qualities.
Pour Slowly
Serve the coffee from the tap or dispenser into a clean glass.
A proper pour should reveal:
- Cascading bubbles
- Creamy head
- Smooth texture
- Rich appearance
Watching the bubbles settle is part of the nitro coffee experience.
Skip the Ice
Nitro coffee is typically served without ice.
Serving it straight from a chilled system helps preserve:
- Texture
- Creaminess
- Flavor concentration
Ice can dilute the beverage and reduce the effectiveness of the nitrogen infusion.
Flavor Enhancements and Variations
While many coffee lovers enjoy nitro coffee black, there are numerous ways to customize it.
Popular Additions
Some enjoyable options include:
- Vanilla syrup
- Caramel syrup
- Cinnamon
- Cocoa powder
- Honey
- Maple syrup
These ingredients can complement the natural sweetness of nitro coffee.
Creative Serving Ideas
Nitro coffee also works well in:
- Coffee mocktails
- Dessert beverages
- Coffee floats
- Smoothie recipes
- Specialty coffee creations
Its creamy texture provides a versatile foundation for experimentation.
Common Mistakes to Avoid
Using Poorly Filtered Coffee
Sediment can interfere with equipment and negatively impact texture.
Brewing Weak Cold Brew
Nitro coffee benefits from a robust coffee base. Weak coffee may taste diluted after infusion.
Serving Warm Coffee
Nitrogen performs best when the coffee is thoroughly chilled.
Ignoring Equipment Maintenance
Regular cleaning helps maintain flavor quality and ensures consistent performance.
Final Thoughts
Nitro coffee brings together the rich flavors of cold brew and the smooth, creamy texture created by nitrogen infusion. Its luxurious mouthfeel, naturally sweet taste, and eye-catching presentation make it one of the most enjoyable coffee experiences available.
Although making nitro coffee at home requires a bit of equipment and preparation, the process is surprisingly accessible for dedicated coffee enthusiasts. By starting with quality cold brew, using proper nitrogen infusion techniques, and focusing on a clean, cold setup, you can achieve café-style results in your own kitchen.
Whether you enjoy it as a refreshing afternoon pick-me-up or a weekend coffee treat, homemade nitro coffee offers a rewarding way to elevate your brewing skills and enjoy a truly unique cup of coffee.


Deal of Day
Shop
Visit Our Store!
Discover products inspired by our blog — click here to explore the store.
Visit NowEvents

Events-Coffee Culture Live
Don’t miss out on exclusive coffee events and community gatherings.
Coming Soon
Jobs


Subscribe now
Subscribe to our newsletter today for a chance to win a FREE one year coffee subscription after your first order!