How to Make Coffee Soap at Home?


How to Make Coffee Soap at Home?
- azeem memon
- 08-07-2021
- 06-11-2026
- 2126 views
- Featured Articles, Coffee Health, Coffee Recipes, Coffee Shop, Coffee Tips, Information
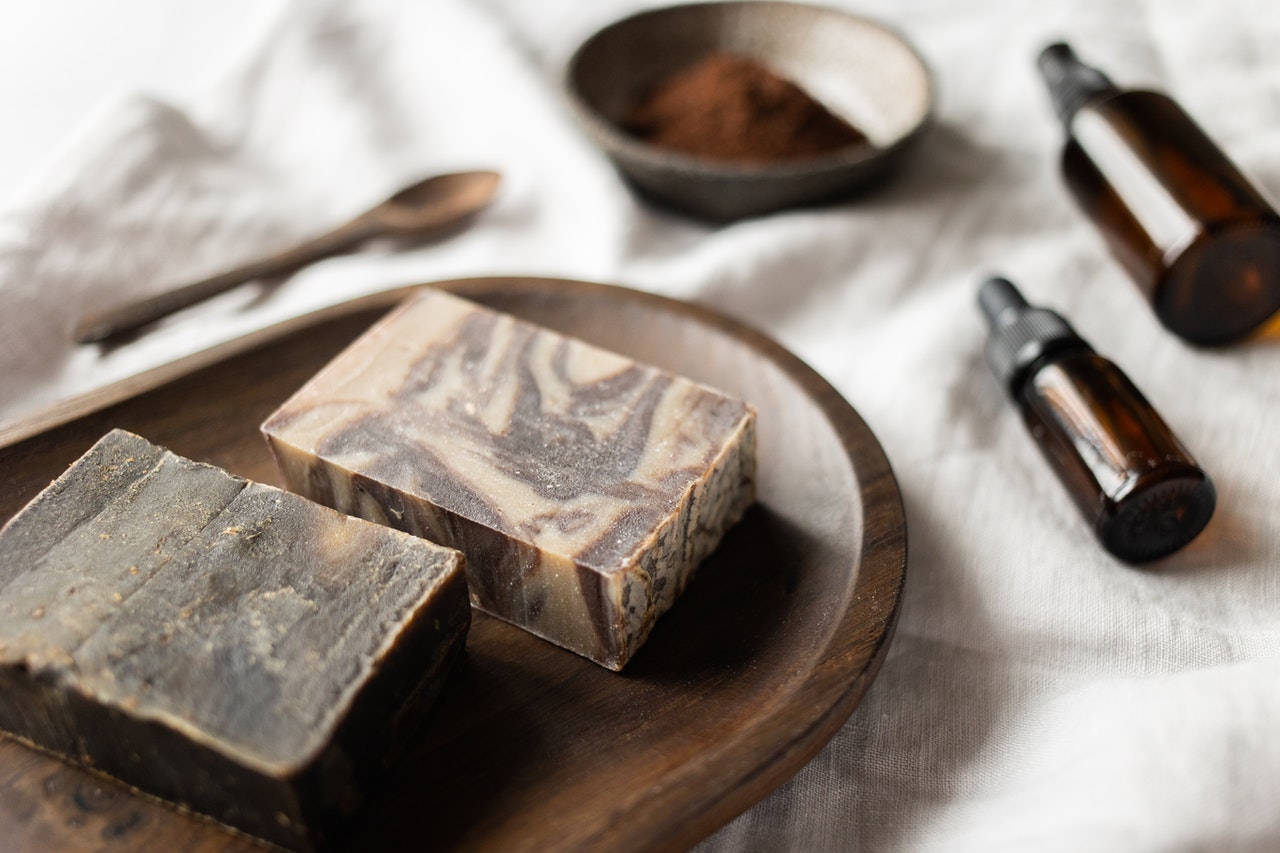
Coffee soap is not just a novelty. When made correctly, it functions as an effective exfoliating bar that can help remove odors, improve skin texture, and add a natural, earthy scent to your routine.
There are two main ways to make it at home. A fast, beginner friendly melt and pour method, and a more advanced cold process method. Both work, but they serve different levels of control and complexity.
Why use coffee in soap
Coffee grounds and brewed coffee bring practical benefits:
- Exfoliation from the coarse texture of grounds
- Odor removal, especially for hands exposed to strong smells
- Mild stimulation of circulation when used as a scrub
- Natural color and scent without artificial additives
The key is balance. Too much coffee makes the bar harsh. Too little makes it ineffective.
Method 1 Melt and pour coffee soap
This is the easiest and safest method. No handling of harsh chemicals and minimal equipment required.
Ingredients
- 500 grams melt and pour soap base
- 2 tablespoons used or fresh coffee grounds
- 2 tablespoons strong brewed coffee
- Optional essential oil such as vanilla or coffee fragrance
Equipment
- Microwave safe container
- Soap mold
- Spoon or spatula
Steps
- Melt the soap base
Cut the base into small cubes and melt in short intervals until fully liquid. Do not overheat. - Add coffee
Stir in coffee grounds and brewed coffee. Mix evenly but avoid over stirring to prevent air bubbles. - Add fragrance
If using essential oils, add a few drops and mix gently. - Pour into molds
Pour the mixture into molds immediately before it begins to set. - Let it harden
Allow the soap to cool and solidify for several hours. - Remove and use
Once fully set, remove from molds and store in a dry place.
Result
A textured soap with visible coffee particles and mild exfoliating properties.
Method 2 Cold process coffee soap
This method gives you full control over ingredients but requires precision and safety.
Ingredients
- 300 grams olive oil
- 200 grams coconut oil
- 100 grams palm oil or alternative
- Sodium hydroxide, also known as Lye
- Strong brewed coffee, cooled and used instead of water
- 2 to 3 tablespoons coffee grounds
Safety note
Lye is caustic. Always wear gloves and eye protection and work in a ventilated area.
Steps
- Prepare coffee liquid
Brew strong coffee and let it cool completely. - Mix lye and coffee
Slowly add lye to the coffee while stirring. Never pour liquid into lye. The mixture will heat up rapidly. - Melt oils
Heat oils until fully liquid, then let them cool slightly. - Combine mixtures
Pour the lye solution into the oils and blend until it reaches a thick consistency known as trace. - Add coffee grounds
Mix in coffee grounds for exfoliation. - Pour into mold
Transfer the mixture into a mold and let it set for 24 to 48 hours. - Cure the soap
Cut into bars and allow to cure for 4 to 6 weeks. This step is essential for proper hardness and skin safety.
Result
A harder, longer lasting bar with deeper color and more control over formulation.
Choosing the right method
Use melt and pour if
- You want speed and simplicity
- You are new to soap making
- You want minimal risk
Use cold process if
- You want full control over ingredients
- You plan to make soap regularly
- You are comfortable handling lye safely
Common mistakes to avoid
Using too many coffee grounds
This makes the soap abrasive and uncomfortable on skin
Overheating the base
This affects texture and clarity
Skipping curing in cold process
Uncured soap can be harsh and unsafe
Using wet grounds without drying
Excess moisture can lead to spoilage or reduced shelf life
Storage tips
- Keep soap in a dry, ventilated area
- Avoid sealed containers while still curing
- Use within a reasonable time to maintain freshness
Final thoughts
Making coffee soap at home is straightforward if you follow process and proportions.
The difference between a usable product and a poor one comes down to control. Control of ingredients, control of technique, and control of expectations.
Start simple, understand the structure, and then refine. That is how you move from experimenting to producing consistent results.


Deal of Day
Shop
Visit Our Store!
Discover products inspired by our blog — click here to explore the store.
Visit NowEvents

Events-Coffee Culture Live
Don’t miss out on exclusive coffee events and community gatherings.
Coming Soon
Jobs


Subscribe now
Subscribe to our newsletter today for a chance to win a FREE one year coffee subscription after your first order!